
How to Set Up a Photography Workflow in 2023

Would you believe me if I told you my photography workflow used to take me twice as long as it does now? Yep, that’s right— twice as long to edit, sort, cull, and deliver. That’s more time I could have spent in front of my camera, with my dog, or simply resting.
It’s not that I’ve been doing photography for so long that I’ve just gotten faster at it. Rather, I’ve found tools that I trust that have enabled me to take my business reduce my workflow, elevate my business, and create processes that enable me to focus on delivering an excellent photography client experience.
One of the best pieces of advice I give to photographers looking to go full-time with their photography business is to have the photography workflow systems in place that will allow you to streamline your business and spend less time on your laptop and more time behind the camera, doing what you love.
In this blog post, I’ll be walking you through exactly what that super simple system looks like and how you can implement it in your own photography business not only so you can cut your workflow in half, but so you can go to part-time to full-time that much sooner.
1) Import the images onto an external hard drive.
In my own business, I use two different 4-terabyte Lacie hard drives for backing up photos. If you’re on the hunt for something a little cheaper, I also recommend WD My Passport.
For photography clients specifically, I start organizing my files by creating a folder and labeling it with the name of my clients, a short description of what the shoot was, and the date of the shoot. As an example: MarkandJohanna_May14th_MaternityShoot. Afterward, I import all of the raw files into the folder.
Now for the exciting part… NOT! That’s right, culling your photos.
2) Cull your photos.
In case you aren’t familiar with the term, culling your photos simply means going through every image and selecting the ones that you want to edit.
Like many of you, I used to do this in Lightroom. Toggling back and forth between photos, zooming in and out to make sure they’re in focus and no one has their eyes closed, waiting for the following image to load, and repeating that process literally hundreds of times over can get exhausting.
If you’re shivering just thinking about it, let me introduce you to your new best friend and my, favorite free photography tool Narrative Select.
With Narrative Select, you can cull your images without needing to be connected to WiFi— making it great for airplanes or cars. It’s also extremely intuitive, uses smart tech, and is extremely fast meaning even if your computer is on the slower side, you are still going to be able to use this tool to its full potential. As an example of just how fast this software is, I was able to upload 3,000 of my RAW files (roughly 40 MB each) in about 10 seconds.
Once they're imported, you are able to start culling using their wide selection of smart tech image assessment tools. One of those tools is able to recognize when someone’s eyes are blinking but is also smart enough to know when someone's eyes are meant to be closed or looking down in a pose.

Another Narrative Select tool that I recommend is the focus rating. So what you can actually do in the program is just filter by “no image assessment warnings” which means that it will select all of the photos without errors and that are objectively good. Once you've made your selections, simply click “ship” and you will be able to send your photos directly into Lightroom.
Trust me when I say that this photography culling software is *literally* going to change your life. I know that's a bold statement, but it's the truth. The best part is that it’s 100% free to use. If you already use and love Narrative Select, let me know in the comments and we can fangirl about it together!
3) Edit in Lightroom.
Afterward, I head into Lightroom to make my edits. I’ve debated making an editing video guide for my YouTube channel, so let me know in the comments if you’d be interested in that!
4) Export the photos.
When exporting I’ll do two different versions— a web-sized image and a full-resolution-sized image. The web-sized image is usually around 1 MB, and a full-resolution size, meaning I’ll bring the quality scale all the way up to 100 on Lightroom, makes each photo about 20 to 25 MB. These are the photos I send to my clients, while my web-sized images are for blog posts.

5) Deliver your client gallery.
Upload those high-resolution photos into your preferred client gallery service. Whether you choose to keep it simple and send over a zip file or upload them to a traditional gallery website, make sure to deliver photos via email.
Bonus tip: Make sure to set a reminder to send a follow-up email asking for a testimonial from your clients about 1-2 weeks after you deliver the final gallery.
6) Create a blog for your photos.
Fun fact, I actually first discovered Narrative Select through their blogging software. It allows me to arrange a collage by dragging and dropping all the photos in a way that I like. Afterward, it generates an HTML code that plops into my blog on my Squarespace website. I insert that code into the blog and like magic, that code creates the collage.
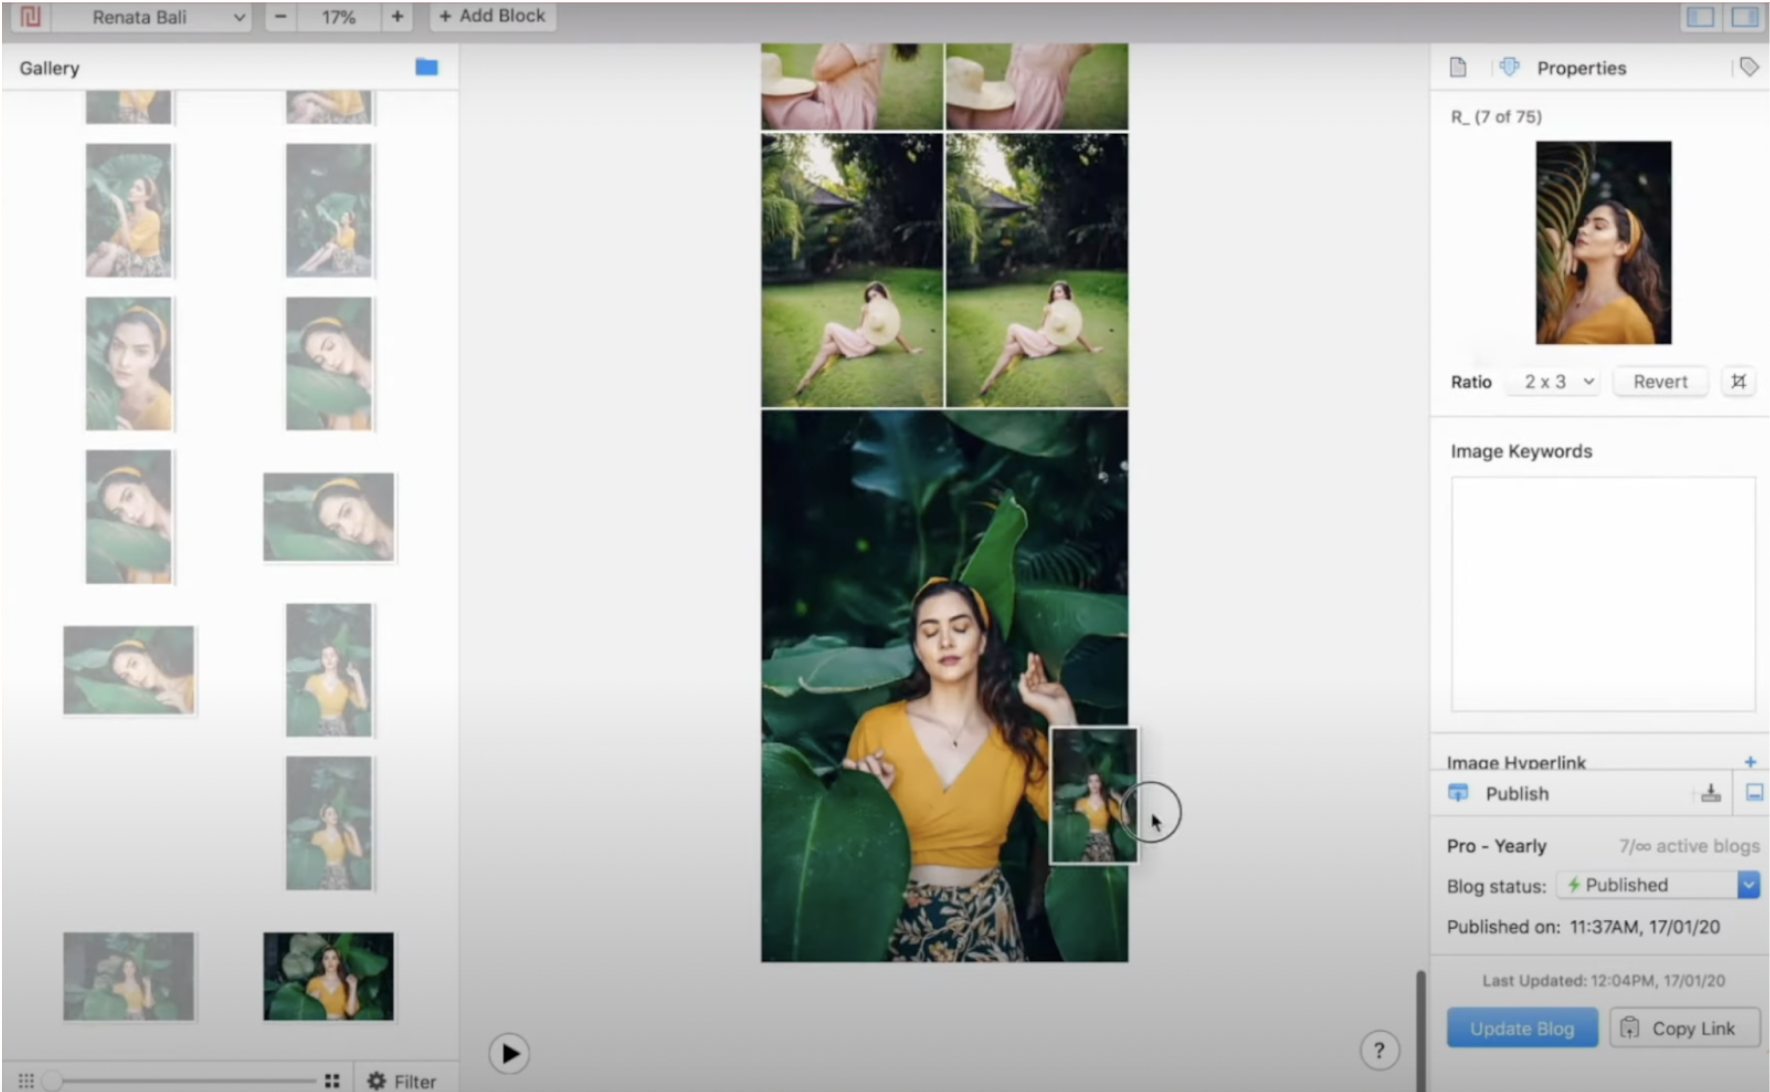
The cool thing is that even though this is a HTML-generated collage, you can still click on all of the images individually. This makes it easy for people pin a single image on Pinterest rather than the entire collage.
7) Create an Instagram post.
If I'm going to be posting on Instagram, I’ll go into Canva to create the post. This is where I'll take advantage of uploading those smaller, web-sized versions of my photos.
If you’re unfamiliar with Canva, it’s the tool I use to design social media graphics for my website, slide decks for my workshops, and so much more. The free version is great, but you can also upgrade to premium which gives you access to a wider selection of templates and tools.
I’ve condensed my workflow down so much that now, the majority of my time is simply spent editing the photos. I hope these tips and tools are ones you can add to your own photography business to help make your photography workflow even faster so that you can get back to being behind the camera and doing what you most enjoy.
Resources:
If you want to check out this blog in video format, click here, and don’t forget to subscribe to my YouTube channel where I share weekly videos full of guidance and advice for photographers.
If you’re looking to receive even more daily tips, tools, and resources? Follow along on my Instagram.
If you're ready to join a kind, encouraging, and inclusive photography community, check out the Build + Bloom Facebook group.
If you like what I teach on YouTube and in blog posts, chances are you'll love my Photography Business Basics course where I share the 8 essential steps to build your photography business and make it bloom. Start your business off on the right foot in a way that is *actually* clear, concise, and easy to understand. Learn more here!
